1. Project management
This week I learned Git basics and set up my page to document my FabLab progress.
Now I am able to edit my website using Mkdocs.
At first I installed Git from the web.
I registered at Gitlab and created my account.
SSH key setup:
To ensure a safe login, i created a SSH key using this command in git bash console:
ssh-keygen -t ed25519 -C "<Fab Lab project Management key>"
It created a public and a private key in this path: C:\Users\Till\.ssh

The public key is in id_ed25519.pub and the private in the other file.
I embedded the public key in Gitlab:
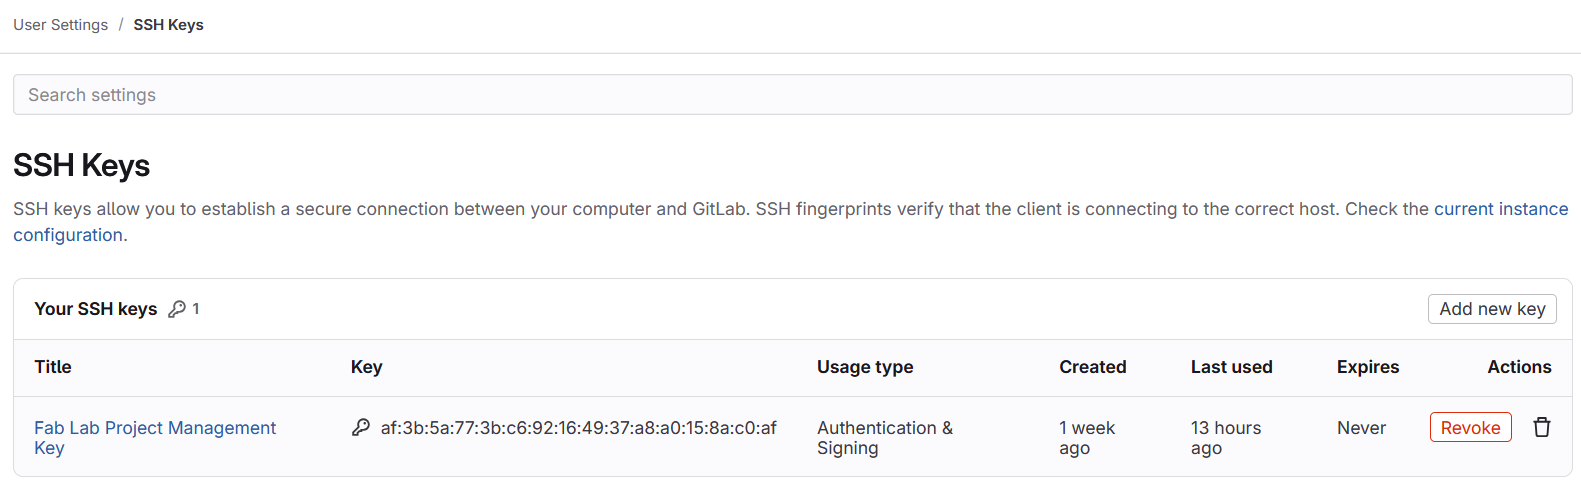
Gitlab uses the public key to check if the private key on your computer, that you should never share, matches.
Fork FabLab Management Project Template
Next I forked the template project for this course in Gitlab.
To do that I went to the concerning project provided by Iván and clicked on Fork:
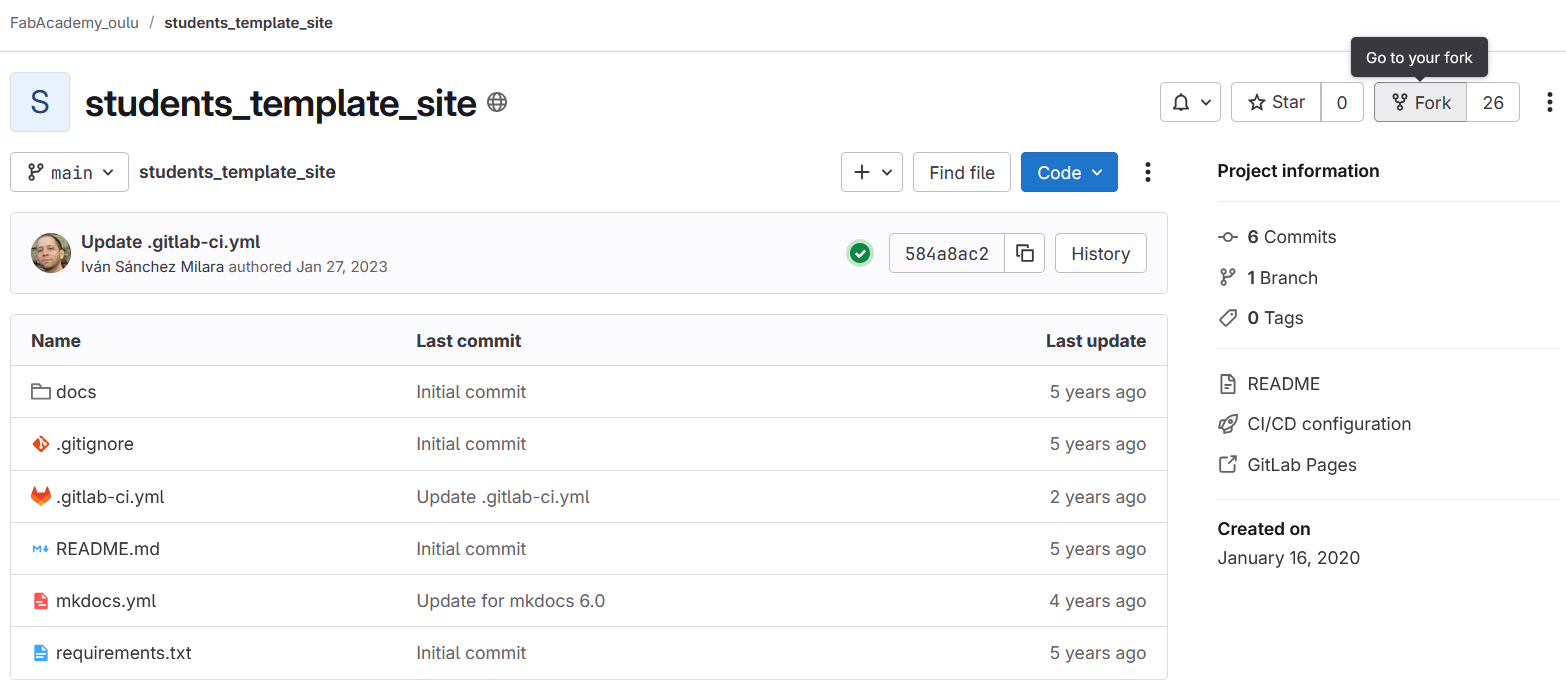
Forking creates a personal copy of the repository where I can now make independent changes.
Cloning the repository
To use the advantages of working with Gitlab I now needed to clone the repository to my local storage.
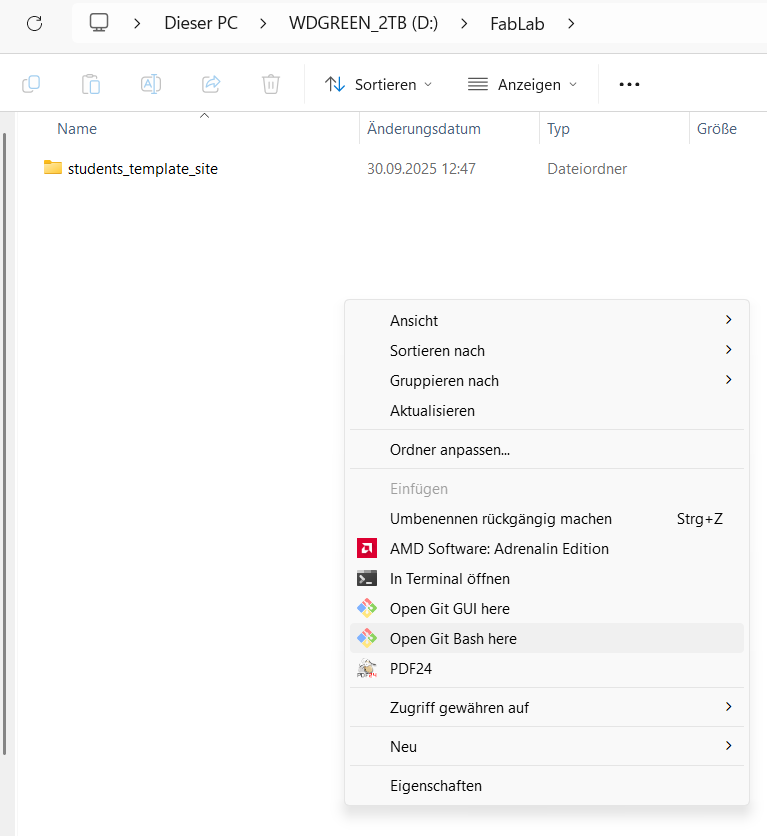
To do that I created a new folder on my SSD. I opened Git Bash in that folder so I wouldn't have to navigate using the console:
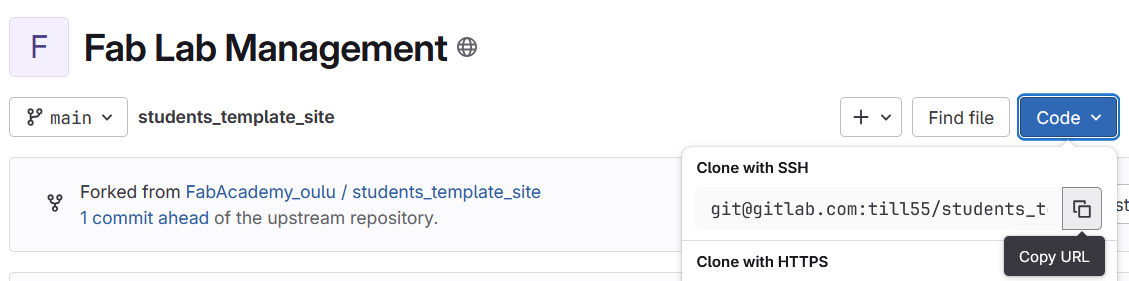
I got the URL to clone the repository with SSH from the project:
Then I used this command in the console to clone the repository to my newly created folder:
git clone <enter Copy URL here>
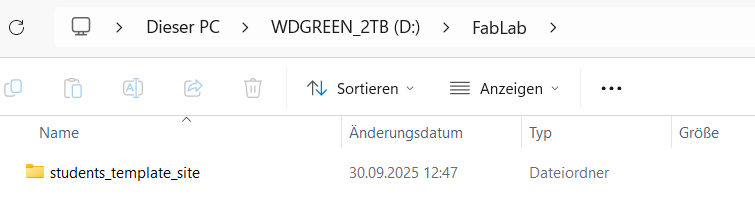
After the command was done, I could see the cloned repository in my folder:
Setting up the website
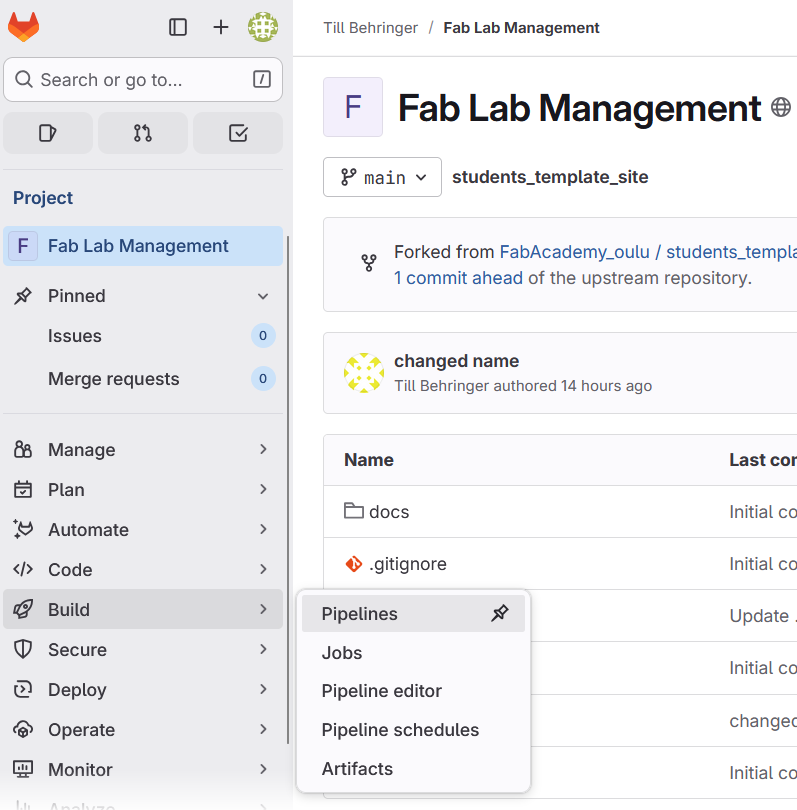
To set up the website I went to Build->Pipelines in Gitlab:
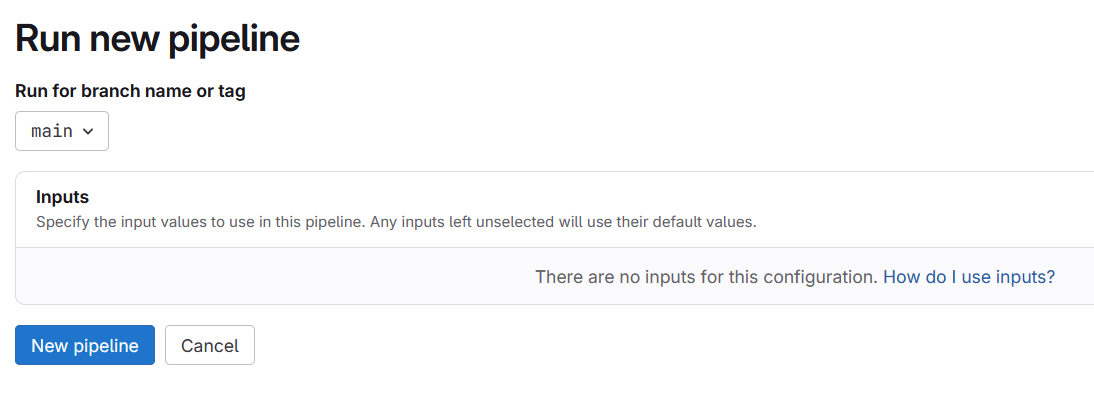
 I clicked on New pipeline here:
 And didn't change any settings here:
This started the hosting of the website and made it available under this link, which I found under Deploy->Pages:
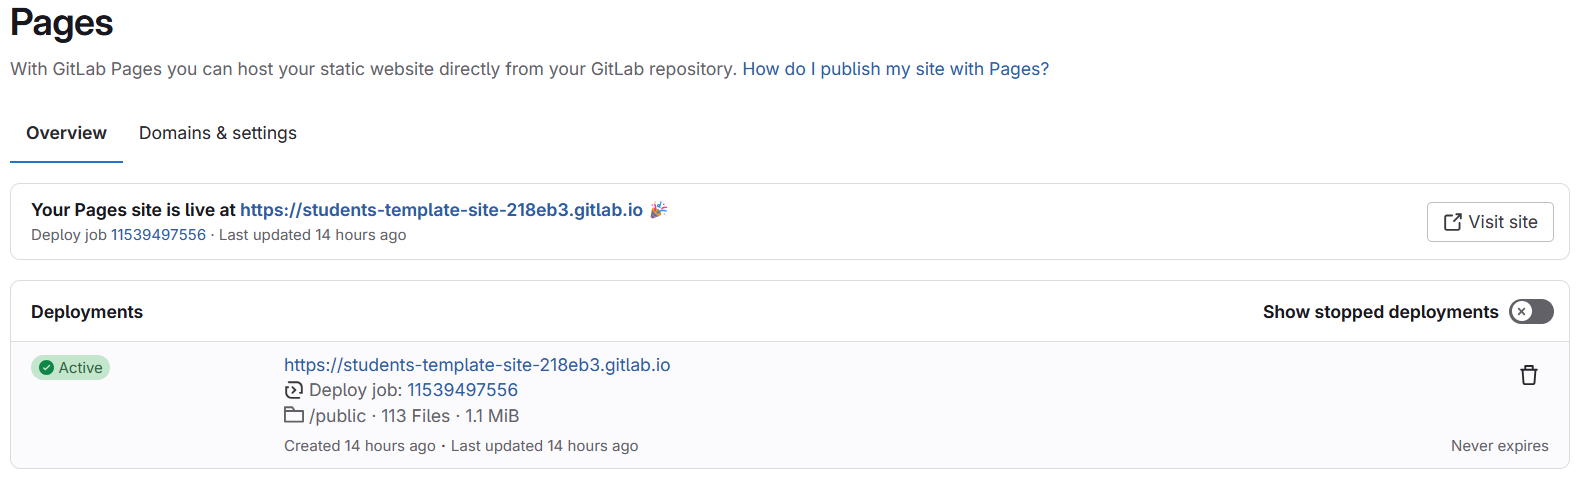
I was told that if I had just pushed some changes of the website to the gitlab before, I didn't have to do activate the website via the pipelines manually. The first time changes are pushed, the website should start automatically in the pipelines.
Installing Mkdocs to edit the website:
Mkdocs is a static site generator that will build a website only from markdown files. This makes it really easy to work with since Markdown is simple to edit. Mkdocs will also provide features like navigation or different themes. One can edit the website's appearance and behaviour (e.g. website structure) by editing the mkdocs.yml.
The .gitlab-ci.yml is the so called CI/CD configuration file. It will make sure that gitlab will run the pipeline for the website again, when changes to the repository have been pushed.
Important Markdown syntax:
Headlines
Adding #'s in front of text and leaving a space will create headlines in different sizes (more #'s make the headline smaller)
example:
# Headline 1
## Headline 2
### Headline 3
#### Headline 4
Images
{width="40%"}

Download files
[Download file](files/document.pdf)
Video linking:
<video controls width="400">
  <source src="/videos/video.mp4" type="video/mp4">
</video>
IMPORTANT!!!
The input.mp4 should not be changed with the usual relative path syntax like for images
../images/screenshot1.jpg
IT NEEDS TO HAVE THIS SYNTAX: /images/screenshot1.jpg Without the dots!
Since my docs folder has this structure:
docs
├───about
├───assignments
├───images
├───models
├───projects
└───videos
/videos/video.mp4
Another look for a playing video:
<video controls playsinline style="max-width:100%; height:auto; border-radius:10px; box-shadow:0 2px 8px rgba(0,0,0,0.2);">
  <source src="/videos/video.mp4" type="video/mp4">
  Your browser does not support the video tag.
</video>
I installed Mkdocs using this pip command in the command line:
pip install mkdocs
Right after, I used this command to the theme of the provided website of the forked repository:
pip install mkdocs-material
Editing the website with Mkdocs:
To actually edit the website I opened the repository folder in VS-Code:
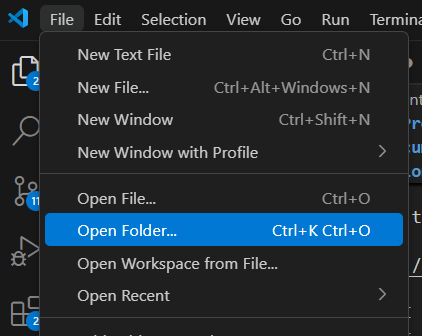
There I can see the websites structure and can change the different assignment pages.
Here I am writing this right now.
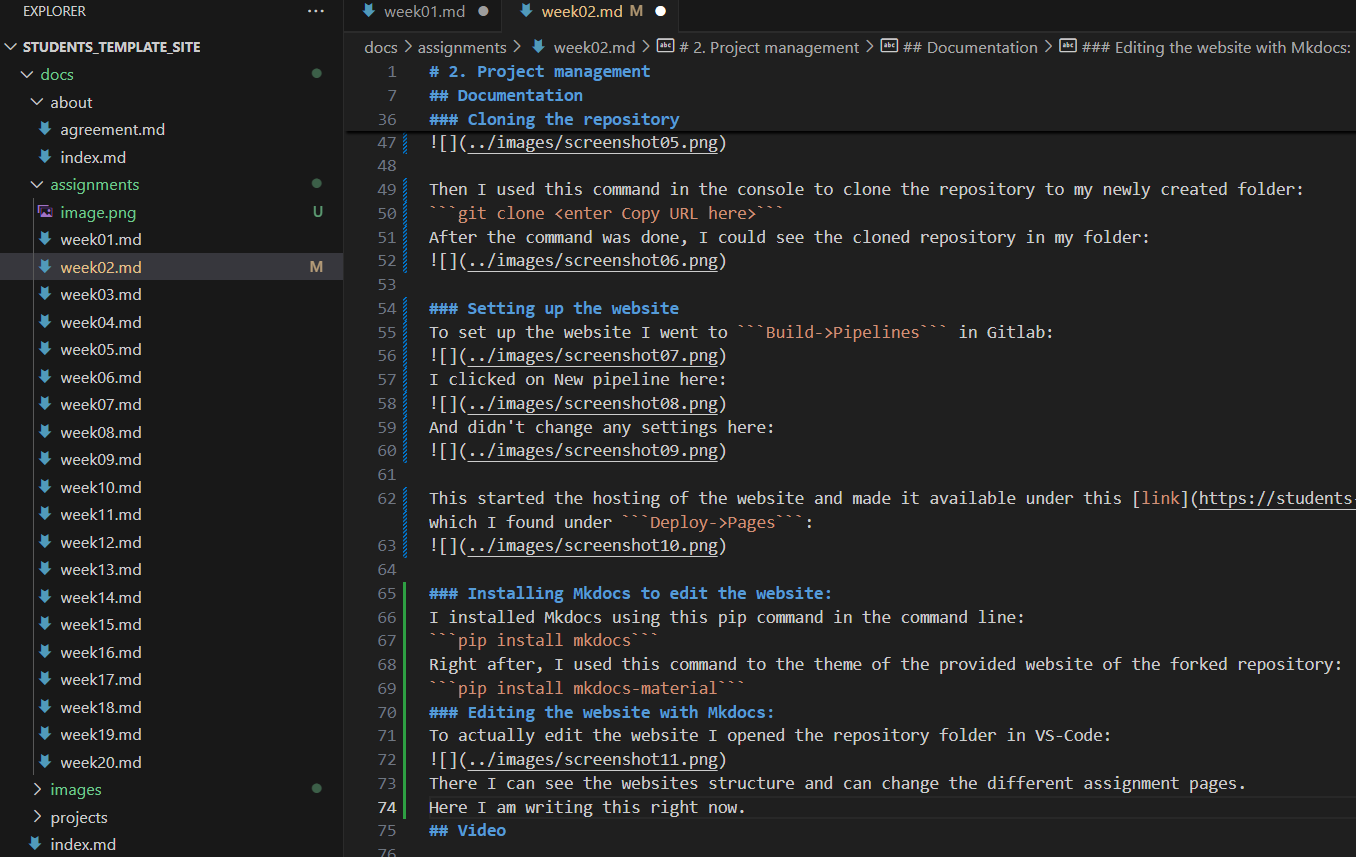
I can change contents by writing Markdown code. To have a local preview of the website with changes through the markdown code I use Mkdocs serve, which host a local server where I can see a regularly updated version of the website.
To start it, I open a command line in the repository folder:
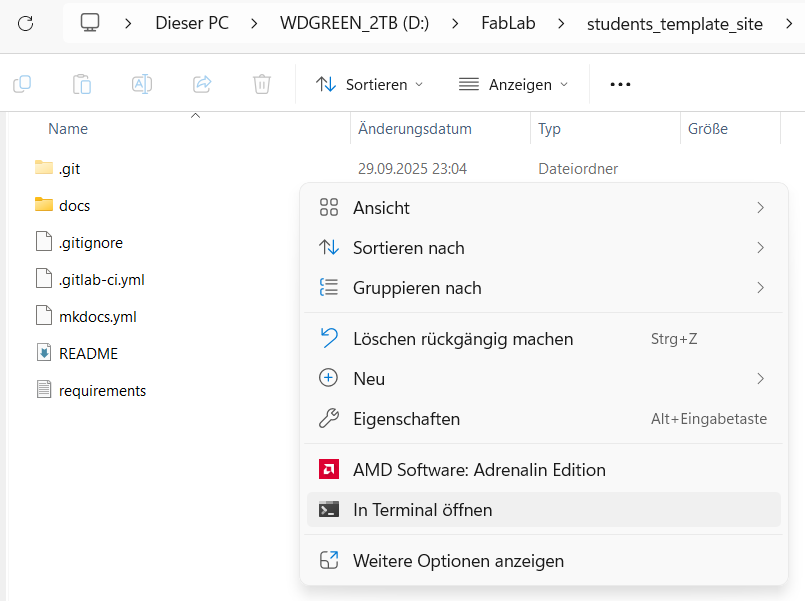
I enter this command to start the local webserver which shows my website:
mkdocs serve
It then shows a link to see the website preview. By opening it in my browser I can see the webpage:
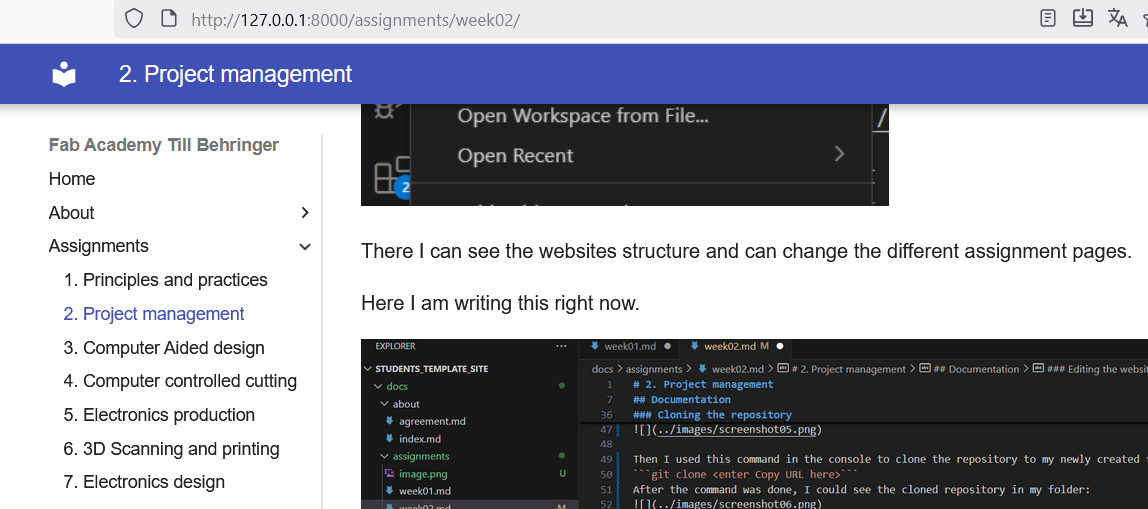
Adding or changing code in the open VSC session and saving changes update the website automatically.
Saving changes to Gitlab
To save the changes I did while working on my website I use these git commands to push my changes to the online repository. I will use these following commands in this order:
git status
git add --all
git commit -m"add comment to the changes made"
git push
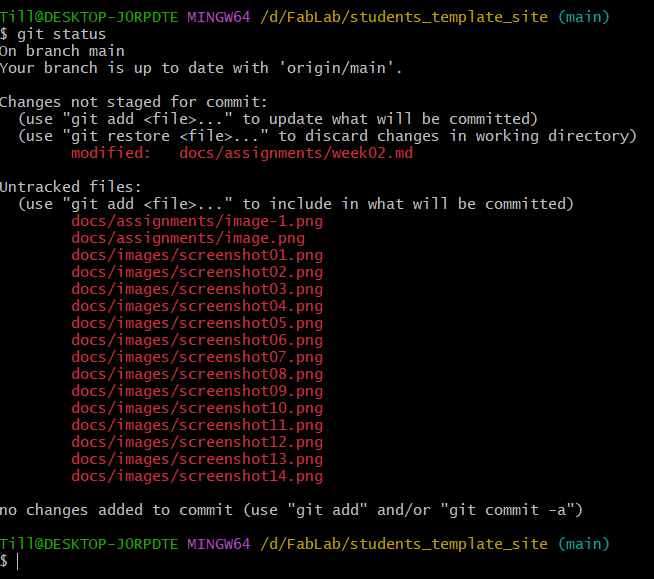
git status
Tells me what changes have been done that differ from the online repository: Example:
git add --all
Stages all modified, deleted, and new files in the working directory and makes them ready to be committed:
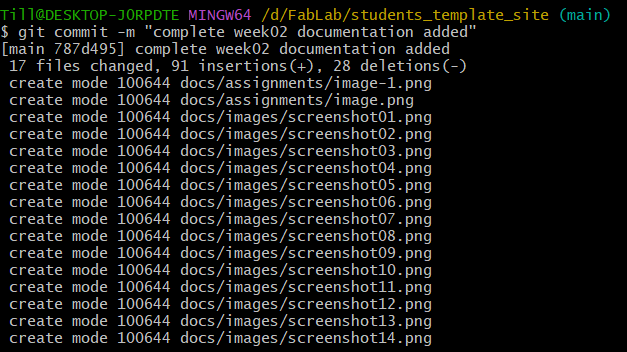
git commit -m "add comment to the changes made"
Saves (commits) all staged changes to the local repository with a descriptive message:
Example:
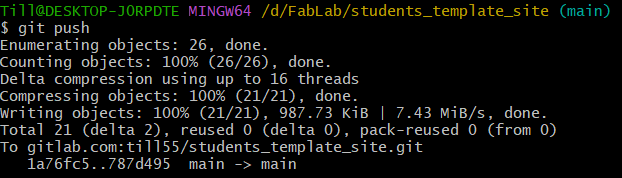
git push
Uploads the committed changes from the local repository to the remote repository on GitLab.
Example:
Using ffmpeg
For the installation I followed this useful video
Using ffmpeg is relatively simple. First, you open the console in the folder that contains the data you want to compress.
Then you only have to execute one of the commands below:
-
variable bit rate 1080p MP3 (replace input_video to match your video file name and output_video.mp4 to desired output file name):
ffmpeg -i input_video.mp4 -vcodec libx264 -crf 25 -preset medium -vf scale=-2:1080 -acodec libmp3lame -q:a 4 -ar 48000 -ac 2 output_video.mp4 -
even smaller size keeping resolution:
ffmpeg -i input_video.mp4 -vf scale=-2:1080 -c:v libx265 -crf 30 -preset slow -tag:v hvc1 -c:a aac -b:a 80k output_video.mp4 -
even smaller size keeping resolution:
ffmpeg -i input_video.mp4 -vf scale=-2:1080 -c:v libx265 -crf 30 -preset slow -tag:v hvc1 -c:a aac -b:a 80k output_video.mp4
Image batch compression:
When multiple pictures should be compressed, make sure that they are all in the same folder. Open a bash console in this folder and execute this command to compress all .jpg files (also changable to .png for example). The script will not overwrite all images but create a new file in the "filename.compressed" format.
for i in *.jpg; do ffmpeg -i "$i" -vf "scale='min(1920,iw)':'min(1080,ih)':force_original_aspect_ratio=decrease" -q:v 6 "compressed_$i"; done
Batch file rename:
To rename multiple files at once i used this powershell command:
First open powershell in the folder that contains all the pictures (in my case). To do that hold shift and rightclick in the window. Without holding shift "open powershell here" doesn't show up.
Then run this command:
$i = 1
Get-ChildItem -File | ForEach-Object { Rename-Item $_ -NewName "<New Name>$i$($_.Extension)"; $i++ }
Edit
$i = 1
Get-ChildItem -File | ForEach-Object { Rename-Item $_ -NewName "image$i$($_.Extension)"; $i++ }